Automatic or "Drive-Thru" Washes:
Automatic car washes are convenient, but those brushes are anything but good for your car. Every speck of dirt, sand, or gravel that comes off of the car before you went one place- into those brushes. No matter how soft they are by design, they become veritable sandpaper by the time they've washed 5-6 cars. Most of them have probably been in service for hundreds, if not thousands of washes. Just imagine all of the little scratches they'll incur to your paint. Especially if you drive a black car. The Horror:"Touchless" or Power Washes:
What about "touchless" car washes, or the "do it yourself pressure wash"? First off, you're car won't be very clean. There will almost certainly be a film of dirt still on the car post-wash. While they're slightly better for your paint than the brushes, the high pressure washes are dangerous in their own right, and potentially far more destructive than brush washes when the worst happens. Imagine this: You've taken a highway jaunt, and a small piece of gravel has bounced up into your bumper and left a small rock chip, all the way down to the plastic. Barely noticeable and extremely common. However, when the high pressure touchless car wash jets warm water directly into the small damaged area at 300psi, the paint around the edges of the chip is blasted back, and what was once an unnoticable chip is now a spot of damage that grows every time you take it through a high pressure wash:Handwashing:
There's really only one real way to do it correctly: handwashing. Yes, it's a bit more involving than putting your car in neutral, turning off your radio, and closing the window, but consider the benefits:- Gentle on paint, tough on dirt.
- Allows you to experience the design of your car in detail through multiple senses.
- Allows you to note any damage (ding, scratch, or blemish) before they worsen.
- Allows you to focus on particularly dirty areas to ensure a very clean car.
(from left to right)
- Wheel cleaner- all-wheel cleaner is recommended
- Wheel brush
- Bucket
- Car wash liquid (DO NOT use dishsoap!)
- Microfiber car wash mit or sponge- (do not use household sponges!)
- Soft, clean cotton terry towel (dry-blade is optional)
- Tire spray
- Shop Rag
Step 1: Clean your wheels:
Park your car in the coolest, shadiest location possible. This will allow you to take your time and not be hurried by the fear of soap spots. If the car has not been driven today, you can start immediately. If you've been driving, allow the car to cool or spray the entire car, particularly the wheels, tires, hood, and roof with cool, clean water to cool it. You may now begin!
Spray your cooled, dirty wheels with wheel cleaner spray and allow it to soak for a few minutes:
 |
| dirty wheel |
 |
| soak |
 |
| spray |
Next, take your wet wheel brush and agitate the brake dust from the face of the wheels. Work methodically around the face of the wheels, and get as far between the spokes as you can. Once you're convinced they're properly brushed, rinse thoroughly:
 |
| Agitating the dirt. |
 |
| Rinse |
Step two: The body:
First, Fill your bucket with soap and water. Whatever the soap bottle says you need (2 capfuls, etc), I recommend 1.5 times that amount. The more soap you have, the less the dirt will scratch the finish and the easier it will be swept away when you rinse. The only detriment is you'll have to rinse more thoroughly.
Next, rinse and cool the car one more time. You'll want to spray it until it is cool to the touch. Otherwise, the soapy water will bake on and leave soap spots, which means you will need to start over. Taking your time and making sure the car is cool will take far less time than starting over.
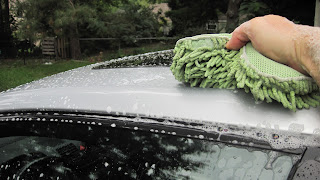
Next, dunk your microfiber sponge int the soapy bucket of water. Do not wring it out. All that soap and water will protect your paint. The drier your sponge, the more damage your finish will endure. No such thing as too much soapy water!
Starting at the roof, start gently and methodically cleaning the car. You'll want to hold the sponge against the paint, but do your best not to press into the paint. Just wisk it across the surface a few times per area. I recommend working in rows or quadrants, so it will be very easy to see where you have cleaned and where you haven't. Remember, the more thorough and organized your wash is, the less time and energy it takes.
Work your way around the whole car methodically, and don't forget to pay extra attention to the rocker panels (the areas where the side of the body curve underneath the car). Rinse often. I recommend rinsing after each section is cleaned (roof- rinse, left side- rinse, etc.) to avoid soap drying and spotting.
Once done soaping and washing, rinse the entire car very thoroughly. Pay extra attention to grilles, trunk/hatch seams, rear view mirrors, and vertical shut-lines (such as doors and windows), as they tend to harbor lots of soap bubbles.
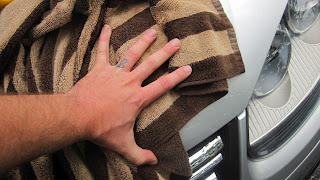
Next, dry the car with the soft, clean towel. Start with your windshield and windows, next the roof and end with the lower panels. If you have a large car, or a dark colored car, follow the first drying with a second, soft dry towel for best results.
The result!
Now, spray some tire shine on your tires (not too much, or they'll look terrible), and use the rag to wipe the over-spray from your nice, clean wheels. Great job, you're finished!
Their are lots of opinions on the best way to hand wash a car. Some would recommend a soap foam gun attachment for the hose (expensive). Others would say use two buckets, one for dirty sponge rinsing and the other for clean water, etc. Unless your car is especially dirty, I think a single-bucket with a garden sprayer on the end works just fine.
Now go show your car some love!


This is pretty much the same way I do it, although I may put a bit too much pressure when 'scrubbing' with the sponge, and I save the tires for the end. I would also add that this is the best time to wax your car. My 2006 Pontiac G6 has only ever been handwashed (not nearly as often as I ought to), but it always gets waxed after handwashing, and it always looks great in the end.
ReplyDeleteThere is obviously a lot to know about this. I think you made some good points in Features also. pressure washing new orleans
ReplyDeleteHey very nice blog!! Man .. Beautiful .. Amazing .. I will bookmark your blog and take the feeds also…
ReplyDeletepressure cleaning southport nc
Really imrpessive site. Very good made.
ReplyDeletepressure washing denham springs la
This is so nice and clean. It looks fantastic. Thanks for posting.
ReplyDeletepressure cleaning southport nc
This is very interesting information.
ReplyDeleteseo baton rouge
A fantastic read….very literate and informative. Many thanks
ReplyDeleteroof cleaning baton rouge
Thanks for sharing information about pedicure cleaning and the meeting. Your blog has always been a source of great beauty tips.
ReplyDeletepressure cleaning southport nc
What a great post, I actually found it very thought provoking, thanks
ReplyDeletegutter cleaning warner robins ga
It's cool to read this out.
ReplyDeletePressure Washing Wilson nc
Great post, and great website.
ReplyDeleteHGH Energizer
Thanks for the information!
ReplyDeleteHGH Energizer
What a good blog you have here. Please update it more often. This topics is my interest. Thank you. . .
ReplyDelete.
wilmington nc pressure washing